Tutorial 2
This tutorial involved importing the Blender animations into Unity and having a muck around with the Animator / Unity events. It was great to finally do some coding, as my experience learning Blender has left me wanting to go back to something familiar. Unfortunately, as always I had a really difficult time importing the animations into Unity, as some would randomly not import properly for no discernible reason. After the 6th attempt it finally worked, even though I did nothing different. Thanks Blender :P
With this done I could finally start working on getting the character moving!
Slidy character after setting up a basic controller script.
Next up was setting up a door using the Unity even system. This involved attaching a trigger script that allows the trigger effect to be set in the unity editor, making it a good tool for having different trigger effects for different objects. This tutorial involved a really simple trigger event, simply causing a door to disappear when the player gets near it.

Disappearing door (not at all janky looking).
Now it was time for the fun part; getting the animations working. This is always one of my favourite aspects of game dev, as it is when the player character comes to life and you can get a feel of what it's like to control them. I went for a different approach than the tutorial, opting to entirely handle the animation states in code rather than using the transitions in the Unity Animator. I did this because I wanted to try something new and see if I prefer this method to using transitions in the Animator window.
I used this video tutorial to work out how to handle animations almost entirely in code:
This is a great video from a great Australian game dev channel that I highly recommend :)
With this, I used the following helper function to change the animation state:
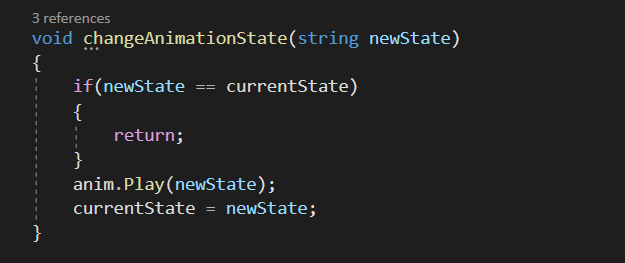
This function replaces the Animator transitions and only requires inputting the new animation state. The guard statement protects from changing to a state the player is already in.
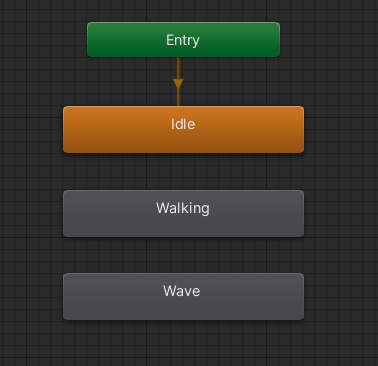
Result of this is a very clean looking Animator screen.
The problem I found using this method is that I miss out on all the useful transition tools in the Animator. This is fine for 2D, where sharply changing animations doesn't look bad at all, but for 3D it looks janky. So in future I'll either try to figure out how to ease between animation transitions in code, or go back to using the Animator transitions .
Here is the code I wrote to control the player:
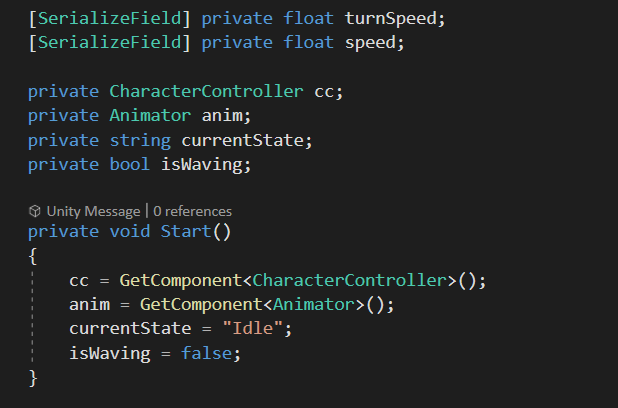
Declaring variables and defining start behaviours.
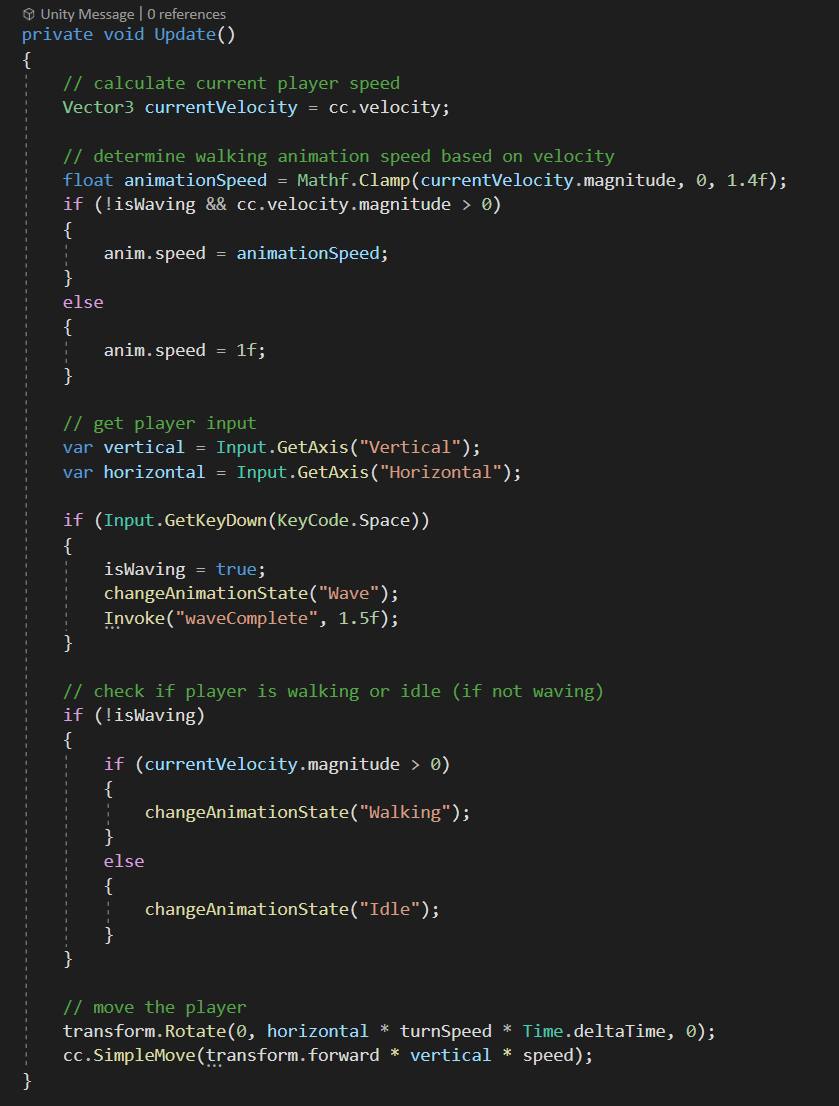
All of the code for controlling the player in Update(). If I were to redo this I would place the code that actually moves the player into FixedUpdate().

Helper function to invoke when the player stops waving.
As you can see, the code is very straightforward. It uses the player's current velocity to determine if the current state is idle or walking (if the player is not currently waving). The player presses 'Space' to wave, which locks them in that animation until it has completed (I achieved this by invoking the waveComplete() helper function). I implemented variable speed of the walking animation by clamping the speed of the player (otherwise it would be too fast) and using this value to set the walking animation speed. This method ensures that the animation speed difference is very apparent when the player is barely moving the analogue stick and then caps out at the max speed so that the animation isn't in ultra turbo mode.
Variable walking.
The final result of my efforts was a player character who can stand, walk, and wave.
Everything finally works.
Overall I really enjoyed this tutorial, and it is definitely my favourite so far. It felt satisfying to see the end product of all my Blender pain, and go back to the comfort of writing some code.
See ya next week :D
Leave a comment
Log in with itch.io to leave a comment.